Hey there! Are you looking to spruce up your home by changing out those old, worn-out electrical outlets? I’m here to guide you through the process and give you all the information you need to confidently tackle this project. Don’t worry, changing an electrical outlet is a simple and straightforward task that anyone can do with the right tools and knowledge. So, let’s get started and transform those outdated outlets into fresh, new ones that not only look great but also function perfectly.
Getting Started: Understanding Electrical Outlets
Let’s start with the basics – understanding what electrical outlets are and how they work. Electrical outlets, also known as receptacles, are devices that allow you to connect your electrical devices to a power supply. They consist of a plug-in connection where you insert the prongs of your devices to access electricity.
Types of Electrical Outlets
There are several different types of electrical outlets commonly found in homes. The two most common types are:
- Standard Outlets: These are the typical outlets you see in most homes, featuring two vertical slots for the prongs of your devices and a round hole for the grounding prong.
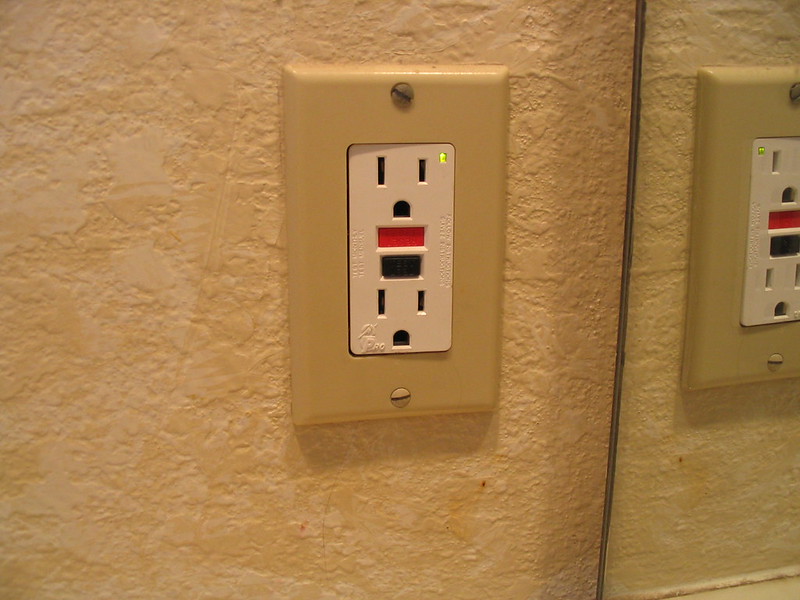
- GFCI Outlets: Ground Fault Circuit Interrupter (GFCI) outlets are designed to protect you from electrical shocks by quickly shutting off power in case of a ground fault.
Understanding the type of outlet you have will be crucial when it comes time to replace it. Make sure you know which type you’re working with before proceeding.
Tools and Materials You’ll Need
Before you begin replacing your electrical outlet, it’s important to gather all the necessary tools and materials. Here’s a list of what you’ll need:
| Tools | Materials |
|---|---|
| Screwdriver | New electrical outlet |
| Needle-nose pliers | Electrical tape |
| Voltage tester | Wire nuts |
| Wire stripper |
Choosing the Right Replacement Outlet
When selecting a new electrical outlet, you’ll want to match the type and configuration of your existing outlet. Ensure you choose an outlet that is rated for the appropriate voltage and amperage for your electrical system. You can find this information on the outlet itself or consult an electrician for guidance.
Step-by-Step Guide to Changing an Electrical Outlet
Now that you have all your tools and materials ready, it’s time to dive into the process of changing out your electrical outlet. Follow these steps carefully to ensure a safe and successful replacement.
Step 1: Turn Off Power
Before doing anything, make sure to turn off the power to the outlet you’ll be working on. You can do this by flipping the corresponding circuit breaker in your electrical panel. Use a voltage tester to double-check that the power is off before proceeding.
Step 2: Remove Old Outlet
Using a screwdriver, remove the screws holding the old outlet in place. Carefully pull the outlet out of the electrical box and disconnect the wires attached to it. Take note of the wire connections to ensure you reconnect the new outlet correctly.
Step 3: Prepare New Outlet
Before connecting the new outlet, strip the insulation off the end of each wire using a wire stripper. Twist the exposed copper wires to ensure a secure connection. If needed, bend the wires into a hook shape to fit around the screws on the new outlet.
Step 4: Connect New Outlet
Attach the black (hot) wire to the brass screw, the white (neutral) wire to the silver screw, and the ground wire (usually green) to the green screw on the new outlet. Tighten the screws securely to make a solid connection. Use wire nuts to cap any unused wires.
Step 5: Secure Outlet
Carefully tuck the wires back into the electrical box and secure the new outlet in place using the screws provided. Make sure the outlet sits flush with the wall and is not crooked.
Step 6: Test the Outlet
Once everything is securely connected, turn the power back on and test the new outlet with your voltage tester. Plug in a device to ensure it is receiving power and functioning correctly.
Safety Tips for Changing Electrical Outlets
Safety should always be a top priority when working with electricity. Follow these important safety tips to protect yourself and prevent accidents:
- Turn off the power: Always turn off the power to the outlet you’re working on to prevent electrical shocks.
- Use proper tools: Make sure you’re using the right tools for the job to avoid damaging the outlet or injuring yourself.
- Double-check connections: Before turning the power back on, double-check all wire connections to ensure they are secure and correct.
- Seek professional help if needed: If you’re unsure about any aspect of changing an electrical outlet, don’t hesitate to contact a licensed electrician for assistance.
Troubleshooting Common Issues
Sometimes, things don’t go as smoothly as planned when changing an electrical outlet. Here are some common issues you may encounter and how to troubleshoot them:
Outlet Not Working
If your new outlet isn’t working after installation, check the following:
- Ensure the wires are connected securely to the correct terminals on the outlet.
- Double-check that the power is turned on at the circuit breaker.
- Test the outlet with a voltage tester to confirm power is reaching it.
Sparks or Burning Smell
If you notice sparks or a burning smell when testing the outlet, immediately turn off the power and inspect the connections. Loose or faulty wiring could be causing a short circuit, which poses a fire hazard.
Outlet Feels Warm
A warm outlet may indicate an overloaded circuit or a poor connection. Make sure the outlet is rated for the correct amperage and that the wiring is secure. If the issue persists, consider consulting an electrician.
Wrapping Up
Congratulations, you’ve successfully changed out your electrical outlet and given your home a fresh update! Remember to dispose of the old outlet responsibly and keep your work area clean. If you have any questions or run into difficulties during the process, feel free to reach out to a professional electrician for assistance. Enjoy your newly upgraded outlet and the improved functionality it brings to your home! If you’re looking to change an electrical outlet in your home or business, look no further than R & T Yoder Electric, Inc. Founded by Rod and Tina Yoder in 2004, this family-owned business has grown to over 50 employees, with second-generation family members working alongside Rod. With years of experience and a commitment to professionalism, you can trust Yoder Electric to get the job done right. Whether it’s in your home or business, they handle every job with care and precision. Remember, when it comes to electrical work, Yoder Electric is the name you can count on.