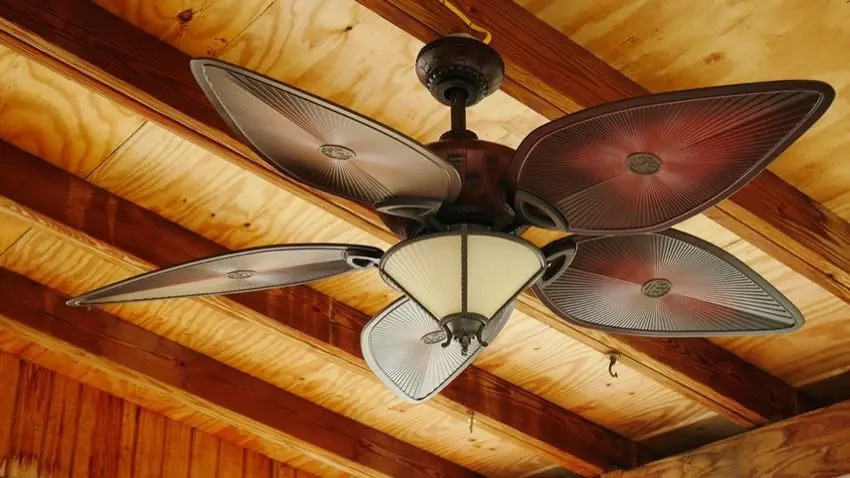
Ceiling fans are a great addition to any home. They not only provide comfort and improve airflow but also enhance the overall aesthetic appeal of a room. Whether it’s to keep cool during the summer months or circulate warm air in the winter, ceiling fans are an efficient and stylish solution. Installing a ceiling fan can seem like a daunting task, but with the right tools, knowledge, and a bit of patience, you can install it like a professional. This comprehensive guide will walk you through every step of the installation process, from preparation to troubleshooting, ensuring that your ceiling fan is set up safely and effectively.
Why Install a Ceiling Fan?
Ceiling fans serve more purposes than simply cooling down a room. They offer practical benefits that contribute to both comfort and energy savings.
1. Energy Efficiency
Ceiling fans help circulate air, which can reduce the need for air conditioning in the summer and keep heat evenly distributed in winter. In colder months, running a ceiling fan in reverse (clockwise) will push warm air down from the ceiling, making your space feel warmer and allowing you to lower your thermostat. This can result in significant energy savings.
2. Enhanced Comfort
Ceiling fans can keep rooms cool by increasing air movement. This enhances comfort, especially in warm weather. Some fans come with adjustable speed settings, so you can customize the airflow to suit the room’s conditions.
3. Aesthetic Appeal
Modern ceiling fans come in a variety of styles, colors, and finishes that complement any decor. Whether you’re installing it in a bedroom, living room, or home office, a stylish ceiling fan can serve as both a functional and decorative element in the room.
Tools and Materials Needed
Before beginning the installation process, gather the following tools and materials. Having everything prepared ensures the job goes smoothly and efficiently.
Tools
- Voltage Tester: To ensure the power is off before working on the electrical system.
- Screwdrivers (Flathead and Phillips): For removing and installing screws in the ceiling fan and mounting bracket.
- Adjustable Wrench: For tightening bolts on the fan motor and mounting.
- Drill with Bits: To drill holes for mounting if necessary.
- Wire Strippers: To strip insulation from the wires when connecting the fan to the electrical supply.
- Ladder: To safely reach the ceiling for installation.
Materials
- Ceiling Fan Kit: Includes the fan blades, motor housing, mounting bracket, and downrod (if necessary).
- Ceiling Fan-Rated Electrical Box: Ensure it can support the weight and vibration of the fan.
- Electrical Tape: For securing wiring connections.
- Wire Nuts: For connecting the wires securely.
- Downrod (optional): If your ceiling is high, a downrod will help position the fan at the optimal height.
- Blade Balancing Kit (optional): If the fan wobbles after installation.
Preparation: What to Do Before Installation
Proper preparation is key to a successful ceiling fan installation. This ensures that the task is done safely and efficiently.
1. Turn Off the Power
The first step is always safety. Turn off the power at the circuit breaker to prevent any electrical accidents. Verify that the power is indeed off by using a voltage tester. Test the existing light fixture or electrical box to ensure no current is running.
2. Choose the Right Fan for Your Space
Selecting the appropriate ceiling fan depends on the size of the room and the ceiling height.
- Room Size: Measure the room’s dimensions and select a fan with the appropriate blade span. For example, rooms smaller than 12 feet square may require a fan with a 36 to 42-inch blade span, while larger rooms (over 12 feet square) should use fans with 52-inch or larger blade spans.
- Ceiling Height: If the ceiling is higher than 9 feet, consider using a downrod. The fan should be positioned at least 7 feet from the floor to prevent safety hazards and to ensure proper airflow.
3. Inspect the Electrical Box
Ensure that the existing ceiling box is rated for ceiling fan use. Ceiling fans are heavier than standard light fixtures and require a specially designed box that can support their weight and motion. If the current box isn’t fan-rated, it’s crucial to replace it before proceeding with the installation.
Step-by-Step Guide to Installing a Ceiling Fan
Now that you’re prepared, it’s time to begin the installation. Follow these steps carefully for a professional-quality result.
Step 1: Remove the Existing Fixture
If you are replacing an existing light fixture, start by removing it. Unscrew the fixture from the ceiling and disconnect the wiring. Keep track of the wire connections as you’ll need to attach the new fan in a similar manner.
Step 2: Install the Fan-Rated Electrical Box
If necessary, replace the old box with a fan-rated electrical box. These are typically designed to withstand the weight of ceiling fans and their vibrations. Secure the box to a ceiling joist, ensuring it’s tightly fastened to prevent wobbling or sagging. If a ceiling joist is not directly behind the box, consider using a brace bar to secure the box across two joists.
Step 3: Assemble the Fan
Follow the manufacturer’s instructions to assemble the fan. This typically involves attaching the fan blades, motor housing, and light kit (if included). Attach the downrod if your ceiling is high and the fan requires one.
Step 4: Install the Mounting Bracket
The mounting bracket attaches to the fan-rated electrical box and holds the fan’s motor. Secure the bracket to the box with screws, making sure it’s level and tightly mounted to avoid any movement once the fan is hung.
Step 5: Wire the Ceiling Fan
- Connect the Wires: At the ceiling, you’ll find three wires—black (hot), white (neutral), and green or bare (ground). Match each wire with the corresponding color from the fan’s motor housing. Use wire nuts to connect them securely.
- Black to Black (hot)
- White to White (neutral)
- Green or Bare to Green or Bare (ground)
- Secure Connections: Once the wires are connected, use electrical tape to wrap around the wire nuts for added security.
Step 6: Attach the Fan to the Bracket
Lift the fan motor and hang it on the mounting bracket. Many fans come with a temporary hook that allows you to rest the fan motor while you complete the wiring. Once the fan is securely hooked, fasten the motor housing to the bracket with screws.
Step 7: Install the Fan Blades
With the motor securely attached, it’s time to install the fan blades. Most fans come with a set of screws to attach each blade to the motor. Make sure all the blades are evenly spaced and securely fastened to avoid wobbling when the fan is in use.
Step 8: Install the Light Kit (If Applicable)
If your fan includes a light kit, attach it following the manufacturer’s instructions. This usually involves connecting the light wires to the fan’s wiring, similar to how you connected the fan motor.
Step 9: Test the Fan
Before securing everything permanently, turn the power back on and test the fan. Check all speeds, the reverse switch (if available), and any lights connected to the fan. Ensure that the fan operates smoothly and without any unusual sounds or wobbling.
Troubleshooting Common Installation Issues
Occasionally, issues may arise during installation. Here are some common problems and how to fix them
1. Fan Wobbles
- Cause: Unevenly installed blades or loose screws.
- Solution: Tighten all screws and check the blades to ensure they are evenly spaced. Use a balancing kit to adjust the fan’s stability if needed.
2. Fan Doesn’t Turn On
- Cause: Incorrect wiring or a faulty motor.
- Solution: Double-check the wiring connections. If the motor still doesn’t turn on, inspect the motor for damage and consider replacing it.
3. Fan Makes Unusual Noises
- Cause: Loose parts or a misaligned motor.
- Solution: Tighten all screws and check for any parts rubbing against each other. Ensure the fan is not in contact with the ceiling or other surfaces.
Safety Considerations
Safety should always be your top priority when working with electricity. Here are some important tips
- Turn off the power at the circuit breaker before starting any electrical work.
- Check all connections to ensure wires are tightly connected and no bare wires are exposed.
- Use the correct tools to prevent injury or damage to components.
- Ensure proper grounding: Grounding the fan prevents electrical shocks.
- Use a sturdy ladder: Make sure you have a stable, safe ladder to reach the ceiling during installation.
When to Call a Professional
While installing a ceiling fan is a task many homeowners can handle, there are situations where it’s best to consult an electrician
- Complex wiring: If your home has outdated or non-standard wiring, professional help is required.
- High ceilings: Installing a ceiling fan on a high ceiling can be dangerous without the proper tools and experience.
- Electrical issues: If you encounter electrical problems like faulty wiring, grounding issues, or frequent breaker tripping, it’s safer to call a professional.
Installing a ceiling fan can be a rewarding DIY project that improves your home’s comfort and energy efficiency. By following this detailed guide, you can install a ceiling fan like a professional, ensuring it is both functional and safe. Proper preparation, the right tools, and a methodical approach are key to a successful installation. However, always prioritize safety, and don’t hesitate to call a licensed electrician if you’re uncertain about any step of the process. With the right installation, your new ceiling fan will provide years of reliable service and enhance the ambiance of your space.


