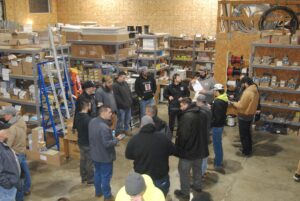
If you’re looking to run electrical wire safely and efficiently, look no further than Yoder Electric. With over 15 years of experience in the industry, Rod and Tina Yoder have built a reputable family business that prides itself on professionalism and customer satisfaction. From small home projects to large commercial jobs, Yoder Electric has the knowledge and expertise to get the job done right. With their team of skilled electricians, you can trust Yoder Electric to handle all your electrical needs with care and precision. Choose Yoder Electric for your next project and experience the difference quality service can make.
Hey there! Are you looking to tackle a DIY electrical wiring project but feeling a bit unsure? Don’t worry, I’ve got your back! In this guide, I’ll walk you through the steps on how to run electrical wire safely and efficiently. Whether you’re adding outlets or installing lighting fixtures, these tips will help you get the job done right. Let’s dive in!
Understanding Electrical Wire Types
Before you start running electrical wire, it’s important to understand the different types of wires available. Here are a few common ones you might encounter:
Romex (Non-metallic Sheathed Cable)
Romex is a common type of electrical wire used in residential wiring. It consists of two or more insulated conductors enclosed in a flexible plastic sheath. Romex is typically color-coded to indicate its gauge and the number of conductors. It’s suitable for use in dry locations.
THHN/THWN Wire
THHN/THWN wire is a popular choice for commercial and industrial applications. It stands for Thermoplastic High Heat-resistant Nylon-coated wire, which makes it suitable for wet and dry locations. THHN/THWN wire is commonly used in conduit wiring.
UF-B Cable
UF-B cable, also known as Underground Feeder cable, is designed for underground use. It’s resistant to moisture and can be buried directly in the ground without the need for conduit. UF-B cable is often used for outdoor lighting and other applications that require wiring in damp locations.
Understanding the different types of electrical wire will help you choose the right one for your project. Make sure to follow local building codes and regulations when selecting wire for your electrical work.
Planning Your Electrical Wiring Layout
Before you start running electrical wire, take the time to plan out your wiring layout. Here are some steps to consider:
Determine Your Electrical Needs
Start by mapping out where you’ll need electrical outlets, switches, and fixtures. Consider the layout of the room and where you’ll position furniture and appliances. This will help you determine the number of circuits you’ll need and where to run your electrical wire.
Create a Wiring Diagram
Drawing a wiring diagram can help you visualize your electrical layout before you start running wire. Include the locations of outlets, switches, and fixtures, as well as the path the wire will take between them. This diagram will serve as a roadmap for your wiring project.
Check Local Building Codes
Before you begin your electrical work, be sure to check local building codes and regulations. Some areas have specific requirements for wiring installations to ensure safety and compliance. Make sure your project meets these standards to avoid any issues down the road.
Planning your electrical wiring layout in advance will make the installation process smoother and more efficient. Taking the time to map out your project will help you avoid mistakes and ensure a successful outcome.
Tools and Materials Needed for Wiring
Having the right tools and materials on hand is essential for running electrical wire safely and efficiently. Here’s a list of some common items you’ll need for your wiring project:
Tools:
- Wire Strippers
- Wire Cutters
- Screwdrivers
- Fish Tape
- Voltage Tester
- Hammer
- Drill
- Tape Measure
Materials:
- Electrical Wire (Romex, THHN/THWN, UF-B)
- Electrical Boxes
- Switches and Outlets
- Wire Connectors
- Cable Staples
- Conduit (if needed)
- Wire Nuts
- Electrical Tape
- Cable Clamps
Make sure to gather all the necessary tools and materials before you begin your wiring project. Having everything you need on hand will save you time and make the installation process run smoothly.
Running Electrical Wire Safely and Efficiently
Now that you’ve planned your wiring layout and gathered your tools and materials, it’s time to start running electrical wire. Follow these steps to ensure a safe and efficient installation:
Turn Off Power
Before you begin working with electrical wire, always turn off the power to the circuit you’ll be working on. Locate the circuit breaker or fuse that controls the area where you’ll be running wire and switch it off. Use a voltage tester to confirm that the power is off before proceeding.
Run Wire Through Walls
Determine the path the wire will take between electrical boxes and fixtures. Use a fish tape to pull the wire through walls, ceilings, or floors. Be mindful of any obstacles or obstructions that may impede the wiring process. Secure the wire in place using cable staples or clamps.
Install Electrical Boxes
Mount electrical boxes in the locations where you plan to install switches, outlets, or lighting fixtures. Make sure the boxes are securely fastened to the wall or ceiling. Follow manufacturer instructions for box installation and ensure they are properly grounded.
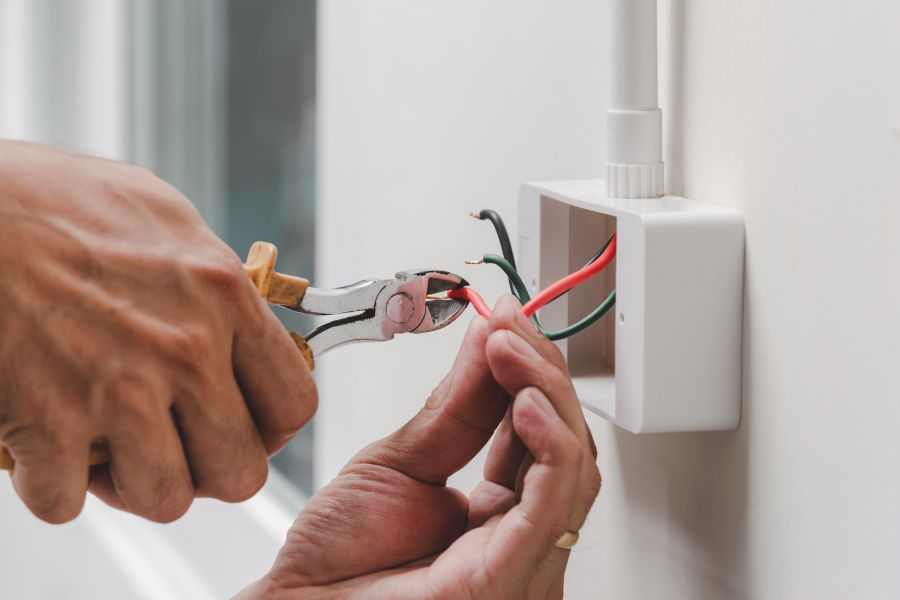
Connect Wires to Fixtures
Once the wire is in place, connect it to switches, outlets, or fixtures according to the manufacturer’s instructions. Strip the wire insulation, twist the conductors together, and secure them with wire nuts. Make sure all connections are tight and properly insulated to prevent electrical hazards.
Test Your Wiring
After completing the installation, test your wiring to ensure everything is working properly. Turn the power back on and use a voltage tester to check for live wires. Test each outlet, switch, or fixture to confirm they are functioning as expected. Make any necessary adjustments to correct any issues.
Running electrical wire safely and efficiently requires attention to detail and careful planning. By following these steps and staying organized, you can complete your wiring project with confidence and peace of mind.
Hiring a Professional Electrician
While running electrical wire on your own can be a rewarding experience, some projects may be best left to the professionals. If you’re unsure about your wiring skills or the complexity of the project, consider hiring a licensed electrician to assist you. A professional electrician will have the expertise and knowledge to handle your electrical needs safely and effectively.
By understanding the different types of wires, planning your wiring layout, and following the proper installation steps, you can tackle your electrical projects with confidence. Remember to always prioritize safety and compliance with building codes to ensure a successful outcome. Whether you’re adding new outlets, installing lighting fixtures, or upgrading your electrical system, these tips will help you get the job done right. Good luck with your wiring projects, and stay safe!